Overview:
Preparation and Soldering:
After Dr. Hamid briefed me on the safety concerns of soldering, I entered the Robotics Lab to begin. First, I cut 4 inches of red and black 22-AWG hookup wire. Once I stripped the plastic ends off using a wire stripper, I attempted to solder them*. As a beginner, it took a few extra minutes to get comfortable with the soldering iron and get it to correctly solder the copper wire. I then unscrewed the power jack and hooked one red end around the inside tab of the jack and one black end around the further tab. I placed the soldering iron on the ends to seal them against the metal tabs, being careful to not let the separate wires touch. I returned the covering of the power jack over the tabs. To the other end of the red and black wire I soldered on a pair of header pins (one to the black wire and one to the white). To ensure that the wires did not cross, I applied heat shrink tubing around where the wires and header pins met.
Then, I took a battery snap that had red and black wire already connected to it. I twisted the wires and soldered the opposite ends. I then unscrewed the power plug (making sure to keep it on the wires, but just moved down out of the way for now) and repeated the process of soldering the red wire to the inside tab and the black wire to the further tab. Once soldered, I screwed the plug cover back over the tabs.
 |
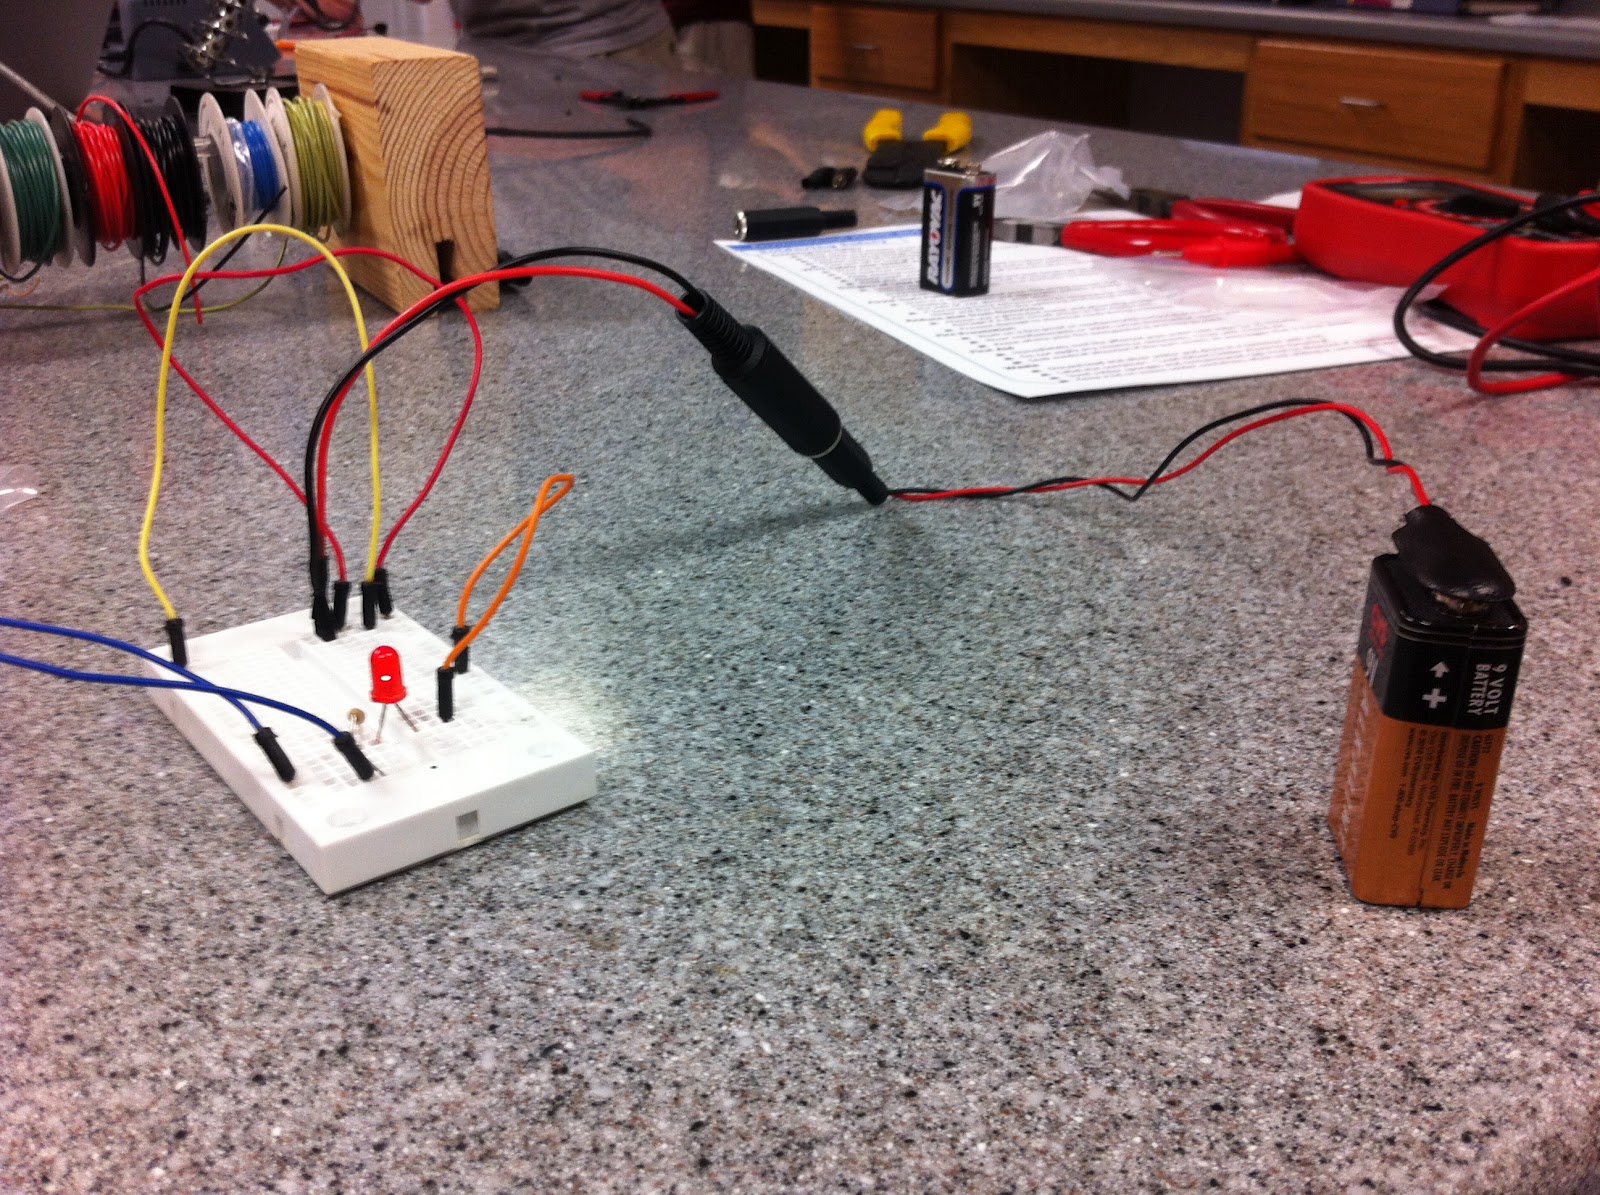
| The completed connection with labeled materials and equipment. |
Testing:
I was then ready to test the connections! I fastened the 9v battery to our battery snap and then inserted the power plug into the power jack. I connected the end with the header pins to a breadboard set up with a test circuit and LED and watched as the LED emitted light, affirming my satisfactory soldering work!

Problems:
Although I did get a successful result, there were a few road bumps I hit that future solderers can avoid.
First, it took my soldering iron a LONG time to solder my first wire. I learned that occasionally, the iron tip needs a method called 'tinning', melting a little solder on the tip of the iron at the beginning of using it, which his helps the heat flow from the iron's tip to the joint. Once I corrected the problem, the copper wire was getting hot enough to soak in the solder.
The other issue I ran into was taking the power jack's cover completely off of the wire and forgetting to put it back on before sealing both ends. In this case, I had to take extra time out of the project to desolder one end and slide the cover back over the jack.
* Pre-soldering the wires was a tip I was given from a more experienced solderer. Applying the solder to the wire while attaching to the parts is also a great way!
More Help:
For more information on this topic here are some really helpful resources:
No comments:
Post a Comment